Note : This post serves as a reminder for me in case one day I need to install woopra again on some other website, I wouldn’t have the same problem I encountered when I installed the first time around
I’m sure you would have heard about Woopra?
Yes? No?
Well in case you haven’t, in a nutshell Woopra is a real-time rich web analytics tool which pretty much tracks your blog or website’s traffic LIVE. Yes it’s real time and it’s LIVE. And yes it’s also free. I’ll let you read more about it in their official FAQ page.
While there is an official Woopra installation guide out there, I decided to do this because I myself struggled a little bit while setting up Woopra on my blog. I found some of the instructions on the official site to be a little vague and succinctly explained.
I’m going to dive straight into the basics of setting up and installing Woopra.
FIrst things first, you can’t instantly sign up for the service. There are a bunch of pre-steps you need to first do getting all techy and configgish with Woopra.
Pre-Steps
1. Sign up on their main website. You will then get the email confirmation with them. Proceed on with the instructions on the email.
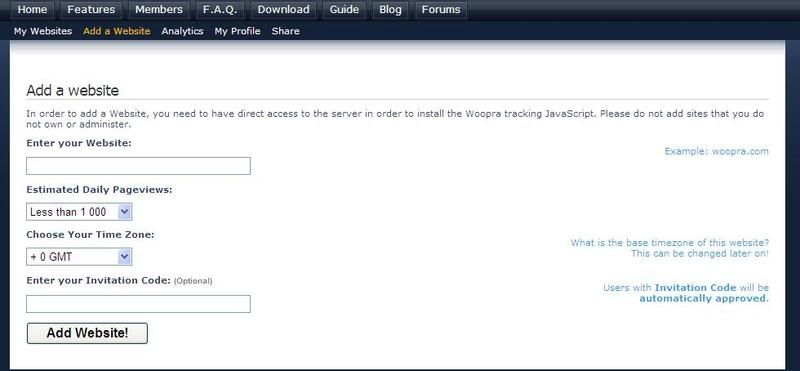
2. Once you’ve already validated your account, click on the add website tab. You will see the following page. Fill in the details accordingly.

Note : Make sure you fill the URL of your site on the “Enter Your Website” space.
For the invitation code, leave it blank for now, as you would need to get the approval for this. Hence your website submission will be pending for about 1 week or so. You will receive an email from Woopra in a week or so stating that your website has been approved.
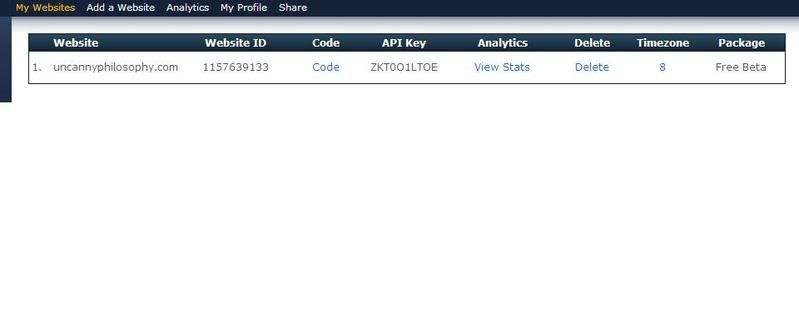
Log in back in to Woopra and click on My Websites now. You should see the Website ID and API Key number for your registered website

The Actual Configuration Steps
3. Now comes the configgish part :). Next, you need to proceed to the installation stage. Woopra’s installation stage consists of two parts. One is to install Woopra on your website (in this case, we’ll be installing the Woopra plugin for WordPress). The other is to install the Woopra desktop client on your PC. The Woopra desktop client will require the latest version of Java to be installed first.
4. Installing the Woopra plugin is just like installing any other wordpress plugin. Once you’re done with the installation (FTPing the php plugin file to the WP plugins folder and activating the plugin on the Admin Plugins page) go to your WP Admin Settings and select on Woopra Settings. (Note : Ensure that you have Woopra 1.3.4 installed!)
5. Add the Website ID and the API Key information. These two IDs appreared on your My Websites page in your Woopra account. Continue on with the Woopra settings and click Save Changes once you’re done.
6. You’re not done yet. The next part is to go to your theme page. Select the theme editor and go to your footer page. You will need to add the Javascript code now in your footer page. The Java script code can also be found in the My Website page of your woopra account. (Click on the button called CODE to get the javascript code). You will SPECIFICALLY need to add the code before the <?php wp_footer(); ?> and </BODY> element in the footer.php file. Here’s how I did mine :

Update the footer.php file and that’s it you’re done with the Woopra configuration.
7. The next step is to install the Woopra desktop client. Once it’s installed, just launch the program by entering your Woopra account details and you’re all set to go 🙂
If you have any questions : feel free to contact me by leaving your comments below or reaching me via the contact page on the right sidebar.
Hope this easy straightforward tutorial helped 🙂

Hi, I found your blog on this new directory of WordPress Blogs at blackhatbootcamp.com/listofwordpressblogs. I dont know how your blog came up, must have been a typo, i duno. Anyways, I just clicked it and here I am. Your blog looks good. Have a nice day. James.
Diablo